 Save
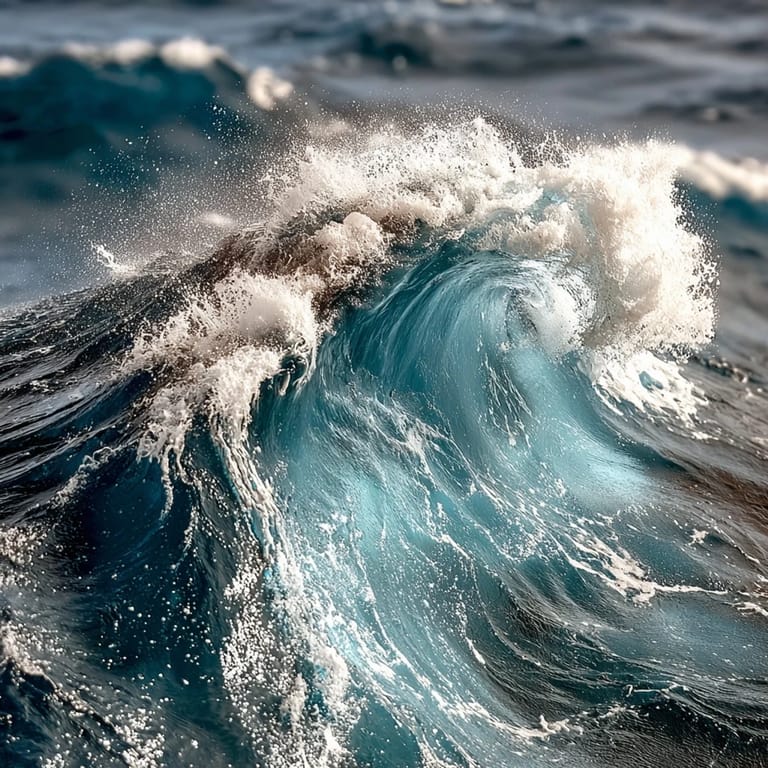
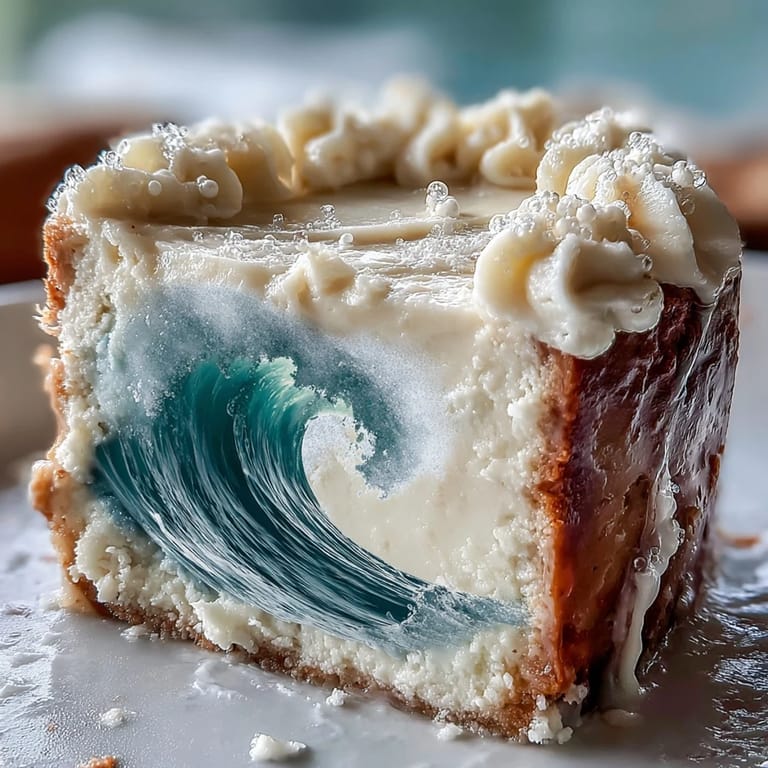
Save My friend showed up with zodiac cake photos pinned to her phone, and I watched her eyes light up describing the ocean waves frozen in buttercream. She'd been craving something that felt both playful and elegant, something that tasted like summer but looked like you'd spent hours mastering a technique you'd never actually tried. I sketched some waves on the back of a grocery list that evening, and by the next weekend, we were standing in my kitchen covered in blue food coloring, laughing at how our hands matched the cake.
I made this for my sister's birthday last spring, and watching her family crowd around the table just to admire it before cutting into it felt like a small victory. One of her kids asked if it was "too pretty to eat," and somehow that question answered itself when everyone's plate had a generous slice five minutes later. The blue ombré made it feel like summer was already here, even though we still had snow on the porch.
Ingredients
- All-purpose flour: Use the kind you already know works in your kitchen—consistency matters more than brand loyalty here.
- Baking powder: Check the date; stale baking powder betrays you silently, and you won't know until the cake comes out flat.
- Unsalted butter and eggs: Room temperature isn't just a suggestion; cold butter fights you during creaming, and cold eggs won't incorporate smoothly.
- Granulated and powdered sugar: Don't skip sifting the powdered sugar for buttercream—lumps are tiny but persistent.
- Pure vanilla extract: The imitation version tastes like regret in buttercream; spend the extra dollar.
- Whole milk: The fat content keeps the cake tender without making it dense.
- Blue gel food coloring: Gel colors don't water down your buttercream the way liquid colors do, which means your waves stay smooth and sculptable.
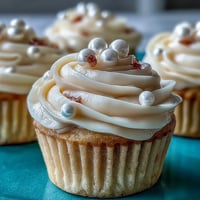
- Edible pearls or fondant: These finish the look without adding to the bake time, though they're completely optional.
Tired of Takeout? 🥡
Get 10 meals you can make faster than delivery arrives. Seriously.
One email. No spam. Unsubscribe anytime.
Instructions
- Set up your stage:
- Preheat that oven to 350°F and spend two minutes greasing and lining your 9x13 pan with parchment paper—the parchment corners should stand up slightly above the sides. This is the difference between a cake that slides out clean and one that tears apart in your hands.
- Combine dry ingredients:
- Whisk flour, baking powder, and salt together in a medium bowl until the mixture looks uniform and you don't spot any tiny lumps of baking powder hiding. This distribution matters because every bite needs the same rise.
- Cream butter and sugar:
- Beat softened butter and sugar together for a full three minutes until the mixture looks pale and fluffy like whipped clouds. This step aerates the batter and gives your cake its tender crumb; rushing it shows in the texture.
- Add eggs one at a time:
- After each egg goes in, wait until it's fully incorporated before adding the next one—you'll see the mixture go slightly broken and then come back together. Once all four are in, beat in your vanilla extract until it disappears into the pale batter.
- Alternate your wet and dry:
- Add about a third of the flour mixture, then half the milk, then another third of flour, then the rest of the milk, finishing with the last flour portion. Mix on low speed just until everything comes together; overmixing develops gluten and makes the cake tough, which defeats the whole point.
- Bake with confidence:
- Pour the batter into your prepared pan, smooth the top with an offset spatula, and slide it into the oven. Bake for 28 to 32 minutes until a toothpick poked in the center comes out clean or with just a few moist crumbs clinging to it.
- Cool strategically:
- Leave the cake in the pan for 10 minutes—this lets it set enough to handle—then turn it out onto a wire rack to cool completely. Rushing this step means warm cake that tears when you frost it.
- Make silky buttercream:
- Beat your softened butter for two minutes until it's creamy, then gradually add sifted powdered sugar on low speed so it doesn't fly everywhere. Once it's combined, add vanilla and milk and beat it smooth; it should be spreadable but hold its shape.
- Create your ocean palette:
- Divide the buttercream into bowls and tint each portion with gel food coloring, making one deep ocean blue, one medium blue, one pale aqua, and leaving one white. The gradient is what makes this cake feel like it's moving.
- Crumb coat first:
- Spread a thin layer of white buttercream over the entire cooled cake to seal in crumbs, then refrigerate for 20 minutes so it firms up. This gives you a clean surface for your decorative layers.
- Layer your waves:
- Using an offset spatula and swooping, curved motions, apply the darkest blue buttercream in wave-like strokes starting at the bottom of the cake. Work your way up, layering lighter shades on top until the waves feel dynamic and the color transitions feel natural, like you're looking at actual water.
- Pipe sea foam:
- Fill a piping bag with white buttercream and a round or petal tip, then pipe or swirl white frosting on top to mimic foam breaking on waves. The white punctuation makes the blue feel more three-dimensional.
- Finish with optional magic:
- Scatter edible pearls across the waves or place a white chocolate Pisces symbol somewhere prominent if you're feeling decorative. This step is purely for joy.
 Save
Save There's something about frosting a cake together that turns a regular Thursday into something memorable. My sister and I ended up frosting three layers because the first two didn't look "wave-like enough," and we weren't frustrated—we were just laughing and tasting buttercream off our fingers and trying different swooping patterns until it felt right. The cake itself was almost secondary to how the making of it became the story.
Why Gel Coloring Changes Everything
The first time I made colored frosting, I used liquid food coloring and watched it turn my buttercream the consistency of soft ice cream. I learned that gel food coloring works with buttercream instead of against it, keeping the structure intact while giving you those saturated blues that look like actual ocean. It's a small detail that makes the difference between a cake that looks homemade-pretty and one that looks like you studied color theory.
The Timing of Temperature
Room temperature ingredients aren't about being fussy—they're about chemistry. A cold egg hitting warm butter breaks the emulsion and you end up with an uneven batter that bakes unevenly. Room temperature milk does the same work as cold milk but mixes smoother, which means fewer lumps and a more tender crumb in the final cake.
Decorating Like You Mean It
Offset spatulas were invented specifically for this moment when you need to move buttercream across a cake like you're painting. The angle of the blade lets you control pressure and movement in ways straight knives just can't match, and the metal stays cool enough that it doesn't drag your frosting. There's something almost meditative about finding your rhythm with it, especially once you realize that perfection isn't the point—movement and confidence are.
- Chill your cake between decorating layers so the frosting doesn't warm up and lose its shape.
- If a wave doesn't look right, just smooth it out with a warm offset spatula and try again.
- Step back and look at the cake from a distance every few minutes so you catch color transitions and wave flow before they're locked in.
 Save
Save This cake sits at the intersection of technique and playfulness, which is exactly where the best kitchen memories live. Bake it because it tastes good and because the act of making it becomes the gift you give yourself and everyone eating it.
Recipe Guide
- → How do I achieve the ombré effect with the buttercream?
Divide the buttercream into several portions and tint each with different shades of blue, from deep ocean to pale aqua, then layer them in wave shapes on the cake.
- → What type of pan is best for this cake?
A 9x13-inch sheet cake pan lined with parchment paper ensures even baking and easy removal.
- → How can I make the vanilla sponge moist?
Using room temperature butter, eggs, and milk along with proper mixing helps maintain a tender, moist texture.
- → Can edible pearls be used safely as decoration?
Yes, edible pearls or sugar pearls are a safe and attractive optional decoration to enhance the aquatic theme.
- → What is the best way to pipe the ocean wave design?
Using round or petal piping tips, apply the colored buttercream in swooping motions starting with the darkest shade at the base and layering upward for a wave-like appearance.
- → How do I prevent the buttercream from thinning when adding color?
Use gel food coloring instead of liquid dyes to maintain the buttercream’s consistency and vibrant hues.